Are you seeking to infuse a touch of elegance into your Canva creations? Elevating your designs can be effortlessly achieved by imparting curvature to your images. This artistic twist bestows a distinctive aura upon your designs, causing them to seize attention effortlessly. Thankfully, Canva facilitates this creative endeavor with utmost simplicity.
When it comes to bending images within Canva, there exist a myriad of techniques at your disposal. One method involves harnessing the prowess of the “Warp” tool. The process is as straightforward as selecting your desired image and subsequently clicking upon the “Warp” icon, conveniently positioned within the upper toolbar. Within this tool, you wield the power to finely calibrate the degree of curvature that graces your image through a convenient slider.
For those who find themselves in the initial stages of their Canva journey or require additional guidance, fret not, for there are invaluable resources readily accessible. The website Canvatemplates.com stands as a beacon of assistance, offering a comprehensive guide on how to establish contact with Canva’s customer support team. Whether grappling with technical quandaries or seeking enlightenment on specific features, their meticulous guide furnishes a step-by-step roadmap to navigate any obstacles with utmost ease.
Exploring the Art of Image Curving
Image curving is a captivating design technique that breathes life and creativity into your visual projects. In the realm of graphic design, it’s a skill that can transform mundane visuals into captivating masterpieces. While Canva provides tools like the “Warp” and “Curve” options to curving enthusiasts, it’s crucial to grasp the essence of image curving before embarking on your creative journey.
What is Image Curving?
At its core, image curving is the art of bending or distorting an image to evoke a specific effect. It’s like molding clay into a shape that suits your artistic vision. Whether you’re aiming to imbue a sense of motion, introduce depth to your design, or enhance visual appeal, image curving is your versatile ally. However, remember that curving doesn’t alter the image’s dimensions; it solely manipulates its shape.
Multiple Paths to Image Curving
As an aspiring image curver, you have an array of techniques at your disposal to achieve your artistic goals. Choose your path wisely:
- Warp Tool: This tool provides a user-friendly way to gently warp an image. It’s ideal for beginners or when you need a subtle transformation;
- Curve Tool: When seeking more precise control, the curve tool comes to the rescue. It allows you to craft intricate curves and bends, perfect for adding that unique flair to your visuals;
- Custom Paths: For the ultimate creative freedom, consider creating your custom path. This method is ideal for complex images or when you need to follow a specific design vision.
The Power of Direction and Intensity
When delving into image curving, don’t underestimate the significance of direction and intensity:
- Direction Matters: The curve’s direction can dramatically impact your image. A curve upwards might convey growth or positivity, while a downward curve can signify tension or descent. Sideways curves can evoke a sense of movement or fluidity;
- Intensity Is Key: Adjust the intensity of your curve thoughtfully. A subtle curve can add elegance and sophistication, while a more pronounced curve can introduce drama and excitement.
Unlocking the Creative Potential: How to Import Images to Canva
When it comes to creating visually stunning designs, Canva empowers its users with a plethora of options to seamlessly import images into their projects. Whether you’re looking to add your personal touch, explore Canva’s extensive stock image library, or pull images from various sources, Canva has got you covered. Let’s dive into the details and explore the various methods for importing images into your Canva designs.
1. Uploading Your Own Images:
- Simply click on the “Uploads” tab located on the sidebar to begin;
- Drag and drop your image file into the designated area for a quick and hassle-free upload;
- Alternatively, click on the “Upload an image or video” button and select the desired file from your computer;
- Pro Tip: Canva supports a wide range of image formats, so feel free to experiment with different types of visuals, from photos to illustrations and icons.
2. Canva’s Image Library:
- Dive into a treasure trove of high-quality images by utilizing Canva’s extensive image library;
- Search for images using keywords related to your project, making it easy to find the perfect visual element;
- Browse through categories or filter images by type, orientation, and color to narrow down your options;
- Once you’ve found the ideal image, a simple drag-and-drop onto your design canvas is all it takes to incorporate it seamlessly;
- Pro Tip: Experiment with various search terms and filters to uncover hidden gems that perfectly complement your design theme.
3. Importing Images from External Sources:
- Canva also provides the convenience of importing images from external sources like Google Drive, Dropbox, and Instagram;
- To get started, click on the “Uploads” tab and select the “Import from…” option;
- Choose the source from which you want to import images, and follow the prompts to connect your account and select the desired images;
- Pro Tip: Keep your external image sources organized to make the import process even smoother. Create folders or albums that are specific to your Canva projects.
Mastering Image Curvature in Canva
Are you ready to take your graphic design skills to the next level? Curving images can add depth and style to your designs, and Canva makes it easy. In this comprehensive guide, we’ll walk you through the process step by step, offering valuable tips and insights along the way.
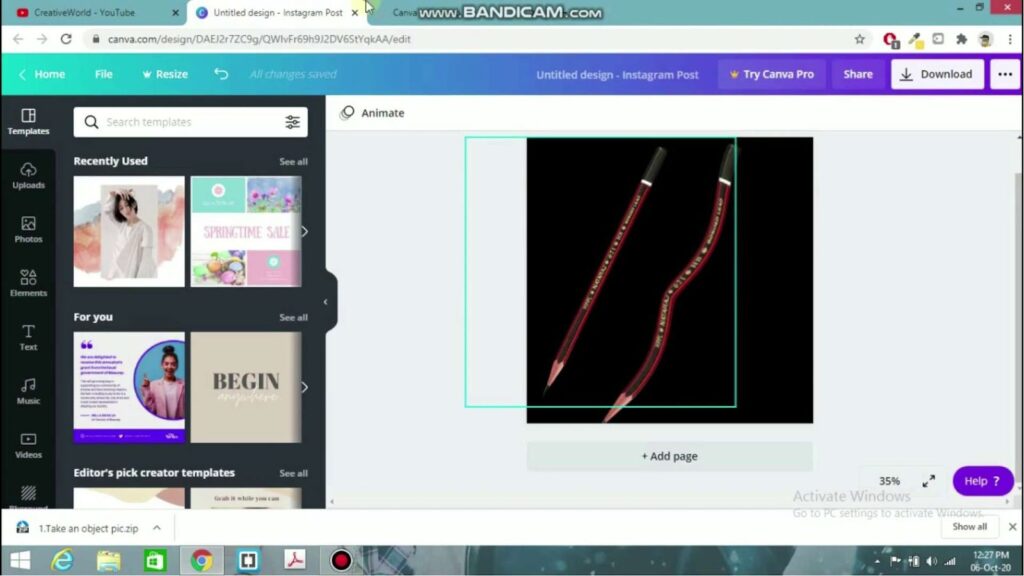
1. Selecting the Perfect Image
Before you can begin curving an image, you need to choose the right one. Canva offers two fantastic options:
- Upload Your Own Image: If you have a specific image in mind that you want to curve, simply upload it to Canva;
- Explore Canva’s Vast Library: Canva boasts an impressive library of over 1 million stock images, illustrations, and icons. Browse through the extensive collection to find the perfect image for your project;
- Pro Tip: When selecting an image, consider its composition and how curving it may enhance your overall design.
2. Accessing the Curve Tool
With your image selected, let’s dive into the editing process:
- Click on the “Edit” button, prominently located in the top toolbar of Canva’s user-friendly interface;
- This action opens the image editor, which houses the powerful “Curve” tool in the left-hand sidebar;
- Insight: Canva’s intuitive interface ensures that finding the Curve tool is a breeze, so you can focus on your creative vision.
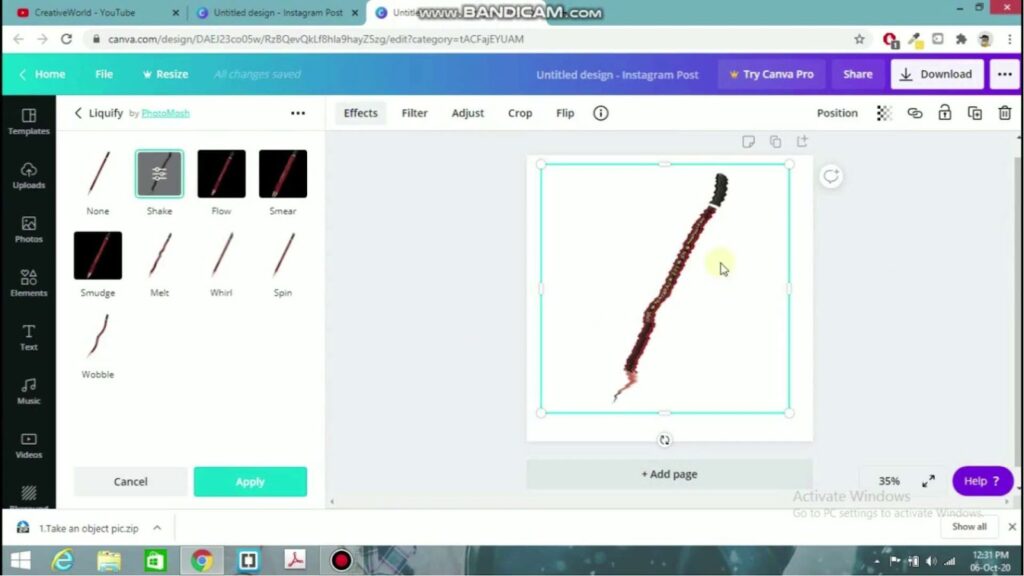
3. Perfecting the Curve
Now comes the exciting part—adjusting the curve to achieve the desired effect. You have two methods to choose from:
- Using the Curve Slider: The simplest approach is to drag the slider left or right. Moving it to the left increases the curve, while moving it to the right decreases it;
- Curving the Border: For more advanced designs, you can also curve the image border. To do this, click on the “Border” tool in the left-hand sidebar, then select “Curve.” You’ll find yourself with ample opportunities to craft unique and eye-catching borders.
Saving Your Creative Work in Canva
After putting your heart and soul into crafting a stunning design in Canva, the next step is ensuring your masterpiece is safely saved and ready for export. Canva has got you covered with an intuitive saving and exporting process. Let’s explore how you can make the most of it:
Automatic and Manual Saving
Canva understands the value of your creative efforts, and that’s why it takes saving seriously. There are two ways to save your work:
- Automatic Saving: Canva’s intelligent system automatically saves your project as you work on it, ensuring that no stroke of genius is lost. This feature eliminates the need for constant manual saves, providing a seamless and stress-free design experience;
- Manual Saving: For those who prefer to take matters into their own hands, the “Save” button, perched on the top right corner of your screen, is your trusty companion. Click it whenever you want to manually save your edits, securing your design at pivotal moments of your creative process.
Exporting Your Design
Once your design is polished to perfection, it’s time to share it with the world. Canva offers a plethora of export options to suit your needs:
- Choose Your File Type: Click on the “Download” button and embark on a journey of file type selection. Canva presents you with a smorgasbord of options, such as PNG, JPG, PDF, and more. Select the one that best suits your project’s requirements;
- Quality Matters: Tailor your export to meet your quality expectations. Canva grants you the power to decide the quality of your output, ranging from low to high. Opt for higher quality for professional prints or opt for lower quality for web usage.
Canva Pro Perks
Unlock a realm of premium features and benefits by upgrading to Canva Pro. With a Pro account, you can elevate your design game:
- Custom Dimensions: Craft your designs in unique dimensions tailored to your specific needs, whether it’s for social media, print, or web;
- Brand Identity Preservation: Save your brand colors and fonts for consistent branding across all your designs, ensuring a professional and cohesive look;
- Access Premium Resources: Gain access to Canva’s extensive library of over 60 million premium images and graphics, opening up a world of creative possibilities.
Also, read about the magic of Canva’s image resizer – your secret to effortless resizing and enhancing visuals like a pro!
Enhanced Image Editing Techniques: Mastering Filters
Filters serve as a powerful tool in the realm of image editing, offering an avenue to transform ordinary photos into visually striking pieces. They can infuse a range of atmospheres into your images, from a nostalgic vintage feel to a modern cinematic quality, or even an abstract artistic expression.
Steps to Apply Filters Effectively:
- Selection: Begin by choosing the image you wish to modify;
- Accessing Filters: Locate the “Filter” option in your image editing software;
- Exploring Pre-sets: Most platforms provide a selection of pre-set filters. Experiment with these to understand their impact on your image;
- Customization: For a more personalized touch, delve into custom filter settings. Here, you can adjust various elements like brightness, contrast, and saturation to fine-tune the image to your liking.
Tips for Maximizing Filter Use:
- Understand the Mood: Each filter conveys a different mood or tone. Consider what atmosphere you want to create with your image;
- Balance is Key: While filters can dramatically improve a photo, overuse can lead to artificial-looking results. Aim for a balance that enhances but doesn’t overpower the original image;
- Experiment with Layers: Some advanced editing tools allow the application of filters in layers, enabling more complex and nuanced effects;
- Combining Filters: Sometimes, a combination of two or more filters can produce a unique look. Experiment with different combinations to discover new effects;
- Consistency in Projects: When working on a series of images (like for a photo album or a social media campaign), maintaining consistency in filter use can create a cohesive visual theme.
Advanced Custom Filter Creation:
For those seeking to go beyond basic filter application, creating a custom filter can be a rewarding experience. This involves deeper manipulation of image settings, allowing for the creation of a unique signature style. Learning to adjust settings such as hue, grain, and vignette can add sophisticated touches to your images.
Enhancing Your Images with Brightness and Contrast
Have you ever wondered how to take your photos from dull to dazzling? Well, look no further! Adjusting the brightness and contrast of an image can work wonders, transforming it into a visually captivating masterpiece. Whether you’re a professional photographer or just a hobbyist, these techniques will help you achieve the desired effect.
Using Canva’s User-Friendly Interface
Canva, a user-friendly graphic design tool, simplifies the process of enhancing your images. To get started, follow these steps:
- Select Your Image: Begin by choosing the image you want to edit. Canva supports a wide range of file formats, ensuring you can work with various image types;
- Access the “Adjust” Feature: Locate and click on the “Adjust” button, which is conveniently placed within Canva’s intuitive interface;
- Fine-Tune with Sliders: Now, you’re in control. Use the brightness and contrast sliders to make precise adjustments to your image. Here’s where your creativity comes into play:
- Increase brightness to make your image vibrant and eye-catching;
- Decrease brightness for a more muted, moody atmosphere;
- Adjust contrast to emphasize details and add depth to your image.
- Achieve Your Desired Effect: Play around with the sliders until you’ve reached your desired effect. Remember, there’s no one-size-fits-all approach; the perfect settings depend on your image and the mood you want to convey;
- Save Your Edited Image: Once you’re satisfied with the results, don’t forget to save your edited image. Canva offers a variety of export options, making it easy to share your masterpiece with the world.
Creating Captivating Text on Curved Images
Adding text to curved images can be an ingenious way to create eye-catching designs that grab your audience’s attention. Whether you’re designing marketing materials, social media posts, or personal projects, this technique can elevate your graphics to a whole new level.
Steps to Add Text to Curved Images
- Select Your Image: Start by choosing the curved image you want to enhance with text. Canva’s versatile platform allows you to upload and edit images seamlessly;
- Access the “Text” Feature: Click on the “Text” button, unlocking a world of creative possibilities;
- Choose Fonts, Colors, and Styles: Canva provides an extensive library of fonts, colors, and text styles. Here’s how to make the most of them:
- Pick a font that complements the image’s theme and tone;
- Select colors that harmonize with the overall color palette of the image;
- Experiment with different text styles, such as bold, italic, or underlined, to convey your message effectively.
- Size and Position Your Text: Flexibility is key. Resize and reposition your text to ensure it flows seamlessly with the curvature of your image. This step ensures your text looks like a natural part of the design;
- Play with Effects: Canva offers various text effects like shadows, outlines, and gradients. These can be used creatively to make your text pop and stand out against the curved background;
- Experiment and Iterate: Design is a creative process. Don’t hesitate to experiment with different text placements, fonts, and styles until you achieve the perfect balance. Remember, there’s no limit to your creativity!
Conclusion
In conclusion, enhancing your Canva designs with curved images is a creative endeavor that can set your creations apart and add a unique flair. Canva provides accessible tools like the “Warp” tool and the option to add borders, both of which allow you to customize the curvature of your images effortlessly. Should you ever require assistance or encounter challenges along the way, resources like Canvatemplates.com offer valuable guidance on reaching out to Canva’s customer support team. With these tools and support at your disposal, you are well-equipped to elevate your design game and make your creations truly stand out.