
Canva, a widely embraced graphic design platform, is renowned for its versatility in creating diverse designs, ranging from social media graphics to professional marketing materials. A pivotal feature of Canva is its capability to incorporate photos into your designs. This guide aims to simplify the process of adding photos to Canva, covering both the upload of personal images and the utilization of Canva’s rich collection of stock photos. In the process of learning how to add an image in Canva, it’s essential to understand how to make an image 300 dpi in Canva, ensuring high-quality and professional results for your designs.
Begin by launching Canva and either starting a new project or opening an existing design. To upload personal images, select the “Uploads” option in the left-hand menu. To find images within Canva, click on “Elements” and then choose “Photos” from the dropdown list. Canva’s library encompasses a multitude of stock photos, including both free and premium options, ensuring a wide selection for every requirement.
After selecting your ideal photo, you can easily drag and drop it into your design. This allows for customization through resizing, cropping, and adjustments to seamlessly integrate the photo into your design. Following these straightforward steps will enable you to enhance your Canva designs with beautiful photos effortlessly.
Adding Images to Canva
Integrating images into your designs with Canva is a straightforward and flexible process. Canva simplifies the task by offering various methods for incorporating photos, including straightforward uploads, intuitive drag-and-drop features, and the ability to import images directly from your social media accounts.
Utilizing the Uploads Feature
Canva’s Uploads feature streamlines the process of adding images. Accessible from the left-hand side of the editing interface, the Uploads tab allows you to easily upload photos. Simply click on the “Upload an image or video” button and choose your desired photo from your computer.
Drag-and-drop for Quick Addition
For an even more direct method, Canva supports drag-and-drop functionality. Find the photo on your computer and drag it right into the Canva editor. This action instantly places the photo into your current design, ready for further customization.
Importing Photos from Social Media
Canva also connects with your social media platforms, enabling you to import photos directly into your design. By selecting the relevant social media option under the “Uploads” tab, you can seamlessly pull images from these accounts into your Canva workspace.
Editing Images in Canva
In the realm of graphic design, mastering image enhancement techniques is crucial. This guide delves into essential methods for transforming photos using popular graphic design tools. We’ll explore techniques for cropping and resizing images, applying artistic filters and effects, and fine-tuning elements like brightness and contrast.
Cropping and Resizing Images
To crop an image, first select it and then activate the cropping feature available in the software’s toolbar. Adjust the cropping frame to your desired dimensions, modifying both size and shape as needed. Finalize your adjustments with the “Apply” button.
Resizing an image involves selecting it and then accessing the resizing feature from the toolbar. You can manually drag the image’s corners to adjust its dimensions or input specific measurements in the “Width” and “Height” options. Confirm your adjustments by clicking “Apply”.
Applying Filters and Effects
Enhance your image with a variety of artistic filters and effects available in the graphic design tool. After selecting your image, open the filter options in the toolbar. Choose from a range of styles, like “Vintage” or “Black and White”. Each filter or effect’s intensity can be adjusted using a dedicated slider, allowing for customized image enhancement.
Brightness and Contrast Optimization
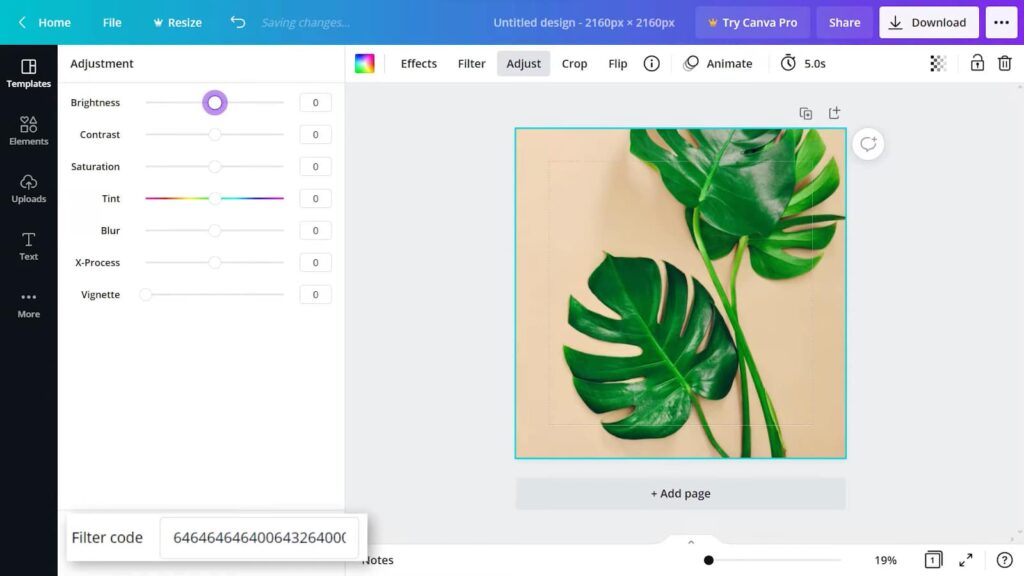
In the field of digital image editing, fine-tuning the brightness and contrast is a fundamental skill. This process can be easily achieved using popular graphic design software. Begin by selecting the image and accessing the “Adjust” option in the software’s toolbar. This will present you with sliders to modify both brightness and contrast levels. After making the desired adjustments, confirm the changes by clicking “Apply”.
Overall, this software offers a comprehensive suite of photo editing tools, enabling users to craft visually impactful designs. Gaining proficiency in these functionalities allows for a significant elevation in the quality and effectiveness of your design projects.
Incorporating Images in Canva Creations
Graphic design software has become a vital tool for both professional and personal design needs. A standout feature of such software is the seamless integration of photos into various designs. This guide will cover the essentials of incorporating photos into your design projects using graphic design software.
Incorporating Photos into Pre-Designed Templates
This software often comes equipped with an array of ready-to-use templates, suitable for a variety of projects. To add a photo to a chosen template, follow these steps:
- Select and open your preferred template;
- Navigate to the “Uploads” section in the interface;
- Use the option to “Upload an image or video”;
- Choose the desired photo for your design;
- Drag and drop the photo into the template.
After placing the photo in the template, you can resize and reposition it to fit your design. Additional adjustments like applying filters and tweaking the photo’s brightness, contrast, and saturation are also available.
Creating Custom Designs with Photos

For more tailored designs, you can start with a blank canvas:
- Initiate a new design project;
- Go to the “Uploads” section;
- Choose “Upload an image or video”;
- Select your desired photo;
- Drag and drop the photo into your design canvas.
Once the photo is in place, adjust its size and position to suit your design. You can then enhance your creation with text and other design elements. Remember, the key to impactful designs is using high-quality, relevant images. The software’s search function can be a great resource for finding images that align with your design’s theme.
Conclusion
In conclusion, the process of adding photos to Canva designs is simple and can greatly enhance the visual appeal of your creations. Whether you are working with a template or crafting a custom design, the inclusion of photos can assist you in producing stunning graphics that truly stand out. Adding photos to Canva is a user-friendly and uncomplicated procedure. Whether you decide to upload your own images or utilize the extensive image library provided by Canva, you can create impressive designs with just a few clicks.