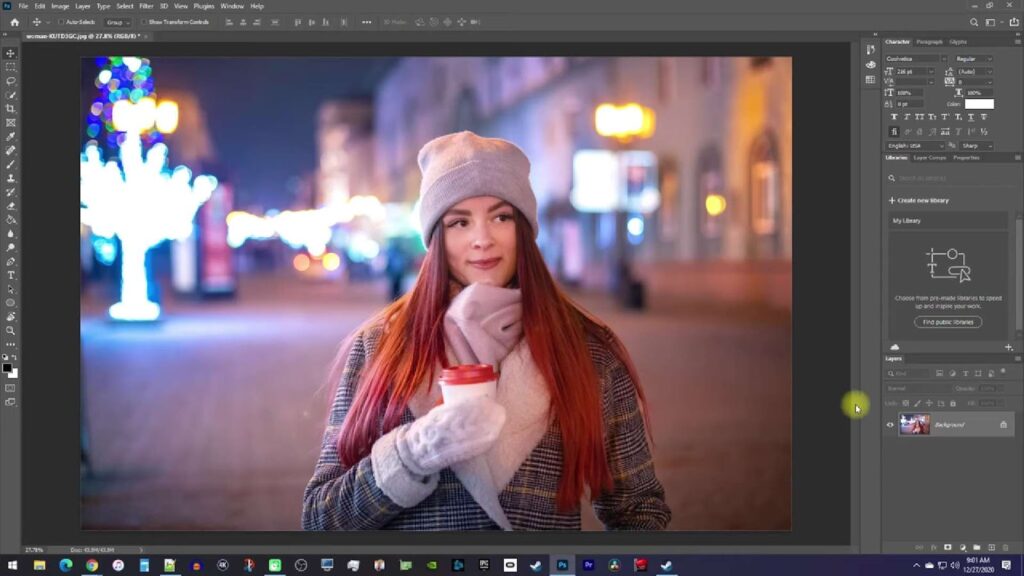
Acquiring the knowledge of how to eliminate backgrounds within the realm of Photoshop constitutes a skill of substantial worth. Such mastery empowers you to craft astonishing graphic designs, granting you enhanced creative latitude. Depending on your envisioned end result, there exist a multitude of techniques at your disposal for transforming the undesirable background of your image into one that is transparent, substituting it entirely with a new backdrop, or altering its color, all within the domain of Adobe Photoshop.
Within this comprehensive tutorial, I shall navigate you through the diverse methods of background removal for an image, utilizing Photoshop CC 2022 on a Mac OS as our platform of choice.
Creating Stunning Images in Adobe Photoshop: A Step-by-Step Guide
Adobe Photoshop is a powerful tool for enhancing and manipulating images, but to make the most of it, you need to be familiar with its essential functions. In this comprehensive guide, we’ll walk you through the process of preparing your image for editing in Adobe Photoshop, from unlocking the background layer to making necessary adjustments. Get ready to transform your images into stunning works of art!
Step 1: Unlock the Background Layer
Unlocking the background layer is the first crucial step in your image editing journey. Here’s how to do it:
- Open Adobe Photoshop and import your image;
- Access the Layers panel by navigating to the menu bar, clicking on “Window,” and selecting “Layers.” This panel is your control center for layer management.
Inside the Layers panel, you will likely find at least one layer, often referred to as the background layer. However, this layer is usually locked, limiting your editing capabilities. To unlock it:
Double-click on the background layer. By doing this, you’re converting it into a regular, editable layer. This unlocks the potential for more advanced adjustments and effects.
Now that you’ve unlocked the background layer, you’re ready to move on to the next step.
Step 2: Duplicate the Layer
Before you start making changes to your image, it’s a good practice to duplicate the layer. This ensures that you always have a backup of the original image. Follow these steps to duplicate the layer:
Within the Layers panel, select the layer you want to duplicate. This is typically the layer you just unlocked in the previous step.
To duplicate the layer, you have two options:
- Option 1: Click the menu button located at the top-right corner of the Layers panel. A drop-down menu will appear. Select “Duplicate Layer.”;
- Option 2: Right-click on the selected layer, and in the resulting context menu, choose “Duplicate Layer.”;
- Your selected layer will now be duplicated, creating an identical copy above or below the original layer. This copy serves as your safeguard against accidental changes or edits that you might want to reverse later;
- With a duplicated layer in place, you’re ready to proceed to the next step, where you’ll start working on the image itself.
Step 3: Make the Duplicate Layer Invisible
Now that you have your duplicated layer, it’s time to focus on the specific edits you want to make without affecting the original image. Making the duplicated layer invisible is essential for this purpose. Here’s how you can do it:
- Locate the duplicated layer within the Layers panel. It should appear just above or below the original layer;
- To make the duplicated layer invisible, you can either;
- Uncheck the box next to the layer. This action effectively hides the layer from view within your workspace;
- Click on the eye icon next to the layer. Clicking the eye icon will toggle its visibility on and off. When the eye icon disappears, it means the layer is now invisible.
By making the duplicated layer invisible, you create a clear canvas on which to perform your edits. The original image remains untouched, ensuring that you have a pristine reference to compare your changes against.
Mastering Background Removal with the Background Eraser Tool in Photoshop
Are you tired of dealing with images that have cluttered backgrounds, making it challenging to highlight your subject effectively? Fear not! We’ll introduce you to a powerful yet often overlooked feature in Photoshop—the Background Eraser Tool. This tool will empower you to precisely remove unwanted elements from your image backgrounds while retaining intricate details.
Why Use the Background Eraser Tool
Sometimes, you find yourself with an image that’s far from picture-perfect, with a subject immersed in a complex background. In such scenarios, the Background Eraser Tool is your go-to solution. Unlike the more automated Remove Background Tool, the Background Eraser Tool gives you granular control, allowing you to manually eliminate specific portions of the background, ensuring a flawless result.
Step-by-Step Guide to Using the Background Eraser Tool
Step 1: Access the Hidden Gem
The Background Eraser Tool may not be readily visible on the Toolbar, which can be perplexing for beginners. However, unearthing this gem is a breeze with the following steps:
- Locate the Toolbar: Start by finding the Toolbar in Photoshop, typically situated along the left side of your workspace;
- Uncover the Hidden Tools: Near the bottom of the Toolbar, you’ll notice three dots. Right-click on these dots, and a sub-toolbar will magically appear, revealing additional tools and options;
- Select the Background Eraser Tool: Among the newly revealed tools, keep an eye out for the one with an icon resembling scissors wielding an eraser. That’s the Background Eraser Tool you’ve been looking for. Click on it to select it.
Step 2: Determining What to Remove and How Much
When embarking on the journey of removing a background from an image, it’s crucial to make informed decisions about what stays and what goes. The process begins with selecting the specific layer you want to work on within your editing software, and this is where the magic happens.
- Explore the Options Panel: Start by clicking on the desired layer and navigating to the options panel located just below the top menu. Here, you’ll unlock a world of possibilities to tailor your background removal experience;
- Brush Preset Picker: Customize Your Brush: One of the key tools at your disposal is the brush preset picker. This versatile tool allows you to not only pick your brush size but also fine-tune its settings. This level of customization can make all the difference in achieving the desired results;
- Fine-tune Hardness and Spacing: Precision is key in background removal. Adjust the hardness and spacing of your brush to control how it interacts with the image. A softer brush may be ideal for feathering edges, while a harder brush can provide cleaner cuts;
- Exploring the Limits: Under the “Limits” option, choose “Contiguous” to determine how the Background Eraser Tool behaves when encountering different areas of your image. Pair this with your selected tolerance level for a comprehensive approach;
- Tolerance Level: This setting is the sensitivity knob of your erasing journey. It defines how closely the tool should adhere to the subject. Here’s how to make the most of it;
- Higher Tolerance Level: Go big to erase the subject with the background. This is useful when you want to completely remove the background;
- Lower Tolerance Level: Opt for a lower setting to allow the tool to detect the subject better and protect it from unintentional erasure.
Step 3: Begin Background Erasure
With your settings optimized, it’s time to put your digital brush to work. The process can be as straightforward or intricate as your image demands:
- Size Matters: Choose a brush size that suits the task at hand. A larger brush is ideal for sweeping away extensive background areas, ensuring efficiency;
- The Devil’s in the Details: For finer details and intricate portions, your tolerance level and limits will require fine-tuning through a bit of trial and error. Here’s how to approach it;
- Experiment with Limits: If you’re dealing with intricate areas around the subject, consider adjusting the “Contiguous” setting to control how the tool interacts with the different regions of your image;
- Refine Tolerance: As you work on detailed parts, you might need to tweak the tolerance level to strike the right balance between preserving the subject and eliminating the background.
Utilizing the Pen Tool for Background Removal
When dealing with images where the subject’s outlines are not distinct enough for Photoshop’s AI detection, the Pen Tool becomes an invaluable asset. This tool enables precise manual tracing of the subject, facilitating the removal of the background with accuracy.
Key Differences of the Pen Tool
Unlike other selection tools in Photoshop, the Pen Tool requires a more hands-on approach. It doesn’t offer automatic area selection with a simple click. Instead, it demands a meticulous process of manually placing points around the subject to create a precise selection path. This process, although time-consuming, results in a much more controlled and accurate selection, especially useful for complex images.
Step 1: Activating the Pen Tool:
- Shortcut Method: Press the ‘P’ key on your keyboard. This action switches your cursor to the Pen Tool;
- Toolbar Method: Locate the Pen Tool icon in the Photoshop Toolbar and click on it.
Step 2: Precision Tracing with the Pen Tool
In this crucial stage of the image manipulation process, you’ll harness the power of the Pen Tool to meticulously trace around your subject, ensuring utmost precision and control. Forget about traditional paper and pen; this is digital artistry at its finest! Follow these detailed steps to master the art of tracing:
- Begin with the Pen Tool
- Locate the Pen Tool in your image editing software (such as Photoshop or Illustrator). It’s often represented by a pen or anchor icon;
- Position your cursor at any point along the subject’s outline.
- Creating Path Points
- Single clicks with the Pen Tool will define path points around your subject, resembling a string of pearls encircling it;
- However, unlike pen and paper, where you draw continuously, with the Pen Tool, each click corresponds to a path point.
- Curved Paths for Precision
- Sometimes, your subject’s contours may demand gentle curves rather than sharp angles. In such cases, click and drag your cursor to create elegantly curved paths following the subject’s shape;
- Alternatively, for straighter sections, you can simply click once and move to the next point, allowing the Pen Tool to adapt.
- Adjusting Path Curvature
- Fine-tune the curvature of your path lines by manipulating the handles of the path points. These handles allow you to craft smooth and precise outlines that conform perfectly to your subject’s intricacies.
- Completing the Trace
- Continue this meticulous path tracing process until you’ve encapsulated your entire subject within the path;
- Before moving on, it’s crucial to close the paths seamlessly by clicking on the first path point. This ensures a continuous outline and is essential for the subsequent background removal step.
Step 3: Master the Art of Background Removal
In this step, we will delve into the fascinating world of background removal, giving your images a professional and polished appearance. Follow these detailed instructions to ensure you achieve the best results:
- Access the Path Panel:
- If the Path Panel isn’t visible, navigate to the top menu and click on “Windows.”;
- Scroll down to “Paths” and click on it to reveal the Path Panel;
- Pro Tip: You can quickly access the Path Panel by using the keyboard shortcut: Ctrl+Shift+P (Windows) or Cmd+Shift+P (Mac).
- Locate the Work Path Layer:
- In the Path Panel, you’ll spot a layer named “Work Path.”;
- Select the “Work Path” layer to activate it.
- Create a Selection from the Work Path:
- Head over to the Path options menu situated at the top-right corner of the panel;
- Click on it, and then select “Make Selection.”;
- Insight: This step transforms your path into a selection, represented by marching ants, outlining the area you intend to keep.
- Fine-Tune Your Selection:
- A window labeled “Make Selection” pops up;
- Ensure the “Feather Radius” is set to 0 for a precise selection;
- Choose “Operation” as “Selection.”;
- Recommendation: For intricate selections, a slight feathering (e.g., 1-2 pixels) can help smoothen the edges.
- Confirm Your Selection:
- Click the “OK” button, and watch the marching ants embrace your carefully traced selection.
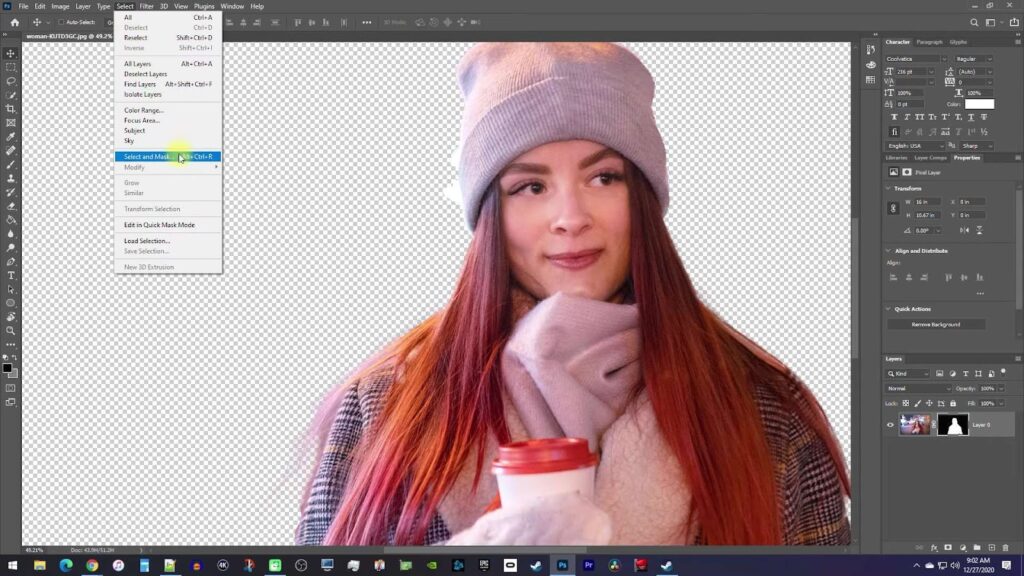
- Access the Select and Mask Tool:
- Return to the top menu and click on “Select.”;
- A dropdown menu will appear; scroll down and select “Select and Mask.”
- Fine-Tune the Mask Output Settings:
- The “Properties Panel” emerges, ready for further adjustments;
- Scroll all the way down to “Output Settings.”;
- Click the arrow on the left to reveal additional options;
- Under “Output to,” click the dropdown menu and select “Layer Mask.”;
- Tip: Choosing “Layer Mask” ensures a non-destructive editing approach, preserving the original image.
- Confirm Your Settings:
- Click the “OK” button to apply your chosen settings.
- Observe the Magic Unfold:
- Back in the Layers Panel, you’ll now notice a black and white layer mask thumbnail accompanying your image layer;
- This layer mask is your key to reversible actions on your image;
- Insight: With this layer mask, you have the power to reintroduce any removed portions or further refine your image as needed, without fear of losing any valuable information.
Mastering Background Removal with Photoshop’s Remove Background Tool
In the realm of photo editing, time is precious. Hours spent painstakingly erasing backgrounds can be better invested elsewhere. Enter the Remove Background Tool in Adobe Photoshop – a marvel that transforms this tedious task into a mere flicker of seconds. This tool, unsurpassed in its efficiency, is a game-changer for anyone seeking to swiftly and effectively separate subjects from their backgrounds. Whether you’re a professional photographer or an enthusiast looking to enhance your photos, this tool is your ticket to quick and impeccable results.
Key Conditions for Optimal Performance
Before delving into the nitty-gritty of using the Remove Background Tool, it’s essential to understand the conditions that maximize its effectiveness:
- High Resolution Images: For the tool to work its magic, it’s best to start with high-resolution images. A higher pixel count ensures greater accuracy in subject recognition and background removal;
- Solid Backgrounds: The Remove Background Tool thrives when confronted with a solid or uniformly colored background. Clear distinctions between the subject and the background facilitate seamless removal;
- Sharp Subjects: The tool excels when dealing with well-defined subjects. Crisp edges and distinct features make it easier for Adobe Sensei, the machine learning technology behind the tool, to recognize and isolate the subject.
Step 1: Unveiling the Magic: How the Remove Background Tool Works
Now that you’re equipped with the knowledge to set the stage for success let’s dive into how this remarkable tool operates:
- Accessing the Properties Panel: To begin, open the Properties Panel, a treasure trove of editing functions within Photoshop. Follow these steps:
- Click on “Windows” in the top menu;
- Scroll down the dropdown menu and select “Properties.”
- Invoke the Remove Background Tool: Once the Properties Panel is open, you’ll find a wealth of functions at your fingertips. In the Quick Actions subpanel, locate and click the “Remove Background” button;
- Witness the Magic: Hold your breath for just a few seconds as Adobe Sensei takes center stage. With a single click, the Remove Background Tool works its enchantment, erasing the background while preserving the main subject in all its glory.
Step 2: Select the Desired Layer
In the exciting world of Photoshop, the journey to create stunning, isolated subjects begins with selecting the right layer. Picture yourself navigating the Layers Panel, where your image’s different elements are neatly organized. It’s like a treasure hunt for the layer you wish to liberate from its background.
Pro Tips:
- Organize Your Layers: Before you even start, make sure your layers are well-organized. Group similar elements together and name your layers descriptively to save time and headaches later;
- Selecting Multiple Layers: In complex compositions, you might want to select multiple layers that make up your subject. Hold down the Ctrl key (Command on Mac) and click on each layer you want to include in your selection.
Step 3: Effortlessly Remove the Background
Ah, the magic begins! Removing backgrounds in Photoshop is now smoother and more intuitive than ever. Let’s dive into the nitty-gritty of this versatile process that’s as easy as pie.
Why it’s the Best Method:
- Simplicity at its Finest: This method offers simplicity in spades. Gone are the days of complex procedures; here, you typically only have to go through one step to remove the background;
- Safety Net Included: The background isn’t obliterated permanently; it’s preserved as a layer mask. This ingenious feature allows you to hide the background or reveal it with a flick of your digital wand, giving you complete creative control;
- Precise Edits: Sometimes, your subject’s edges may need a little TLC. Fear not! The layer mask lets you easily refine those edges to perfection;
- Ready to Roll: Once you’re done, your subject is primed and ready for action, set against a transparent canvas or any backdrop you desire.
Unlocking the Hidden Gem: The “Remove Background” Button
But wait, if you don’t see the “Remove Background” button in the Quick Actions subpanel, don’t despair just yet. Your image might be playing hard to get as a locked background layer. Here’s how you unlock its potential:
- Unlocking the Background Layer:
- Locate the locked background layer in your Layers Panel;
- Click on the layer to select it;
- In the Layers Panel’s upper-right corner, you’ll find a small lock icon. Click on it to unlock the layer.
- Now, back to the Quick Actions subpanel:
- Once you’ve successfully unlocked the background layer, return to the Quick Actions subpanel;
- Voilà! The “Remove Background” button should now be visible, eagerly awaiting your command.
- Pro Tip:
- Layer Locking Etiquette: Locking layers can be a useful way to protect important elements of your composition from accidental changes. However, remember to unlock them when you need to perform edits or employ tools like “Remove Background.” It’s all about finding the right balance between security and flexibility in your Photoshop workflow.
Mastering Background Removal with Photoshop’s Select Subject Tool
At times, the art of image editing requires more finesse than just layer masking. Sometimes, you yearn to meticulously pick out your subject from a cluttered background. Enter Photoshop’s Select Subject Tool, a powerful feature tucked away within the Quick Actions subpanel of the Properties panel. This tool opens up a world of possibilities, letting you extract your subject with precision. Let’s dive into how you can seamlessly employ this tool to elevate your editing game.
Step 1: Initiating the Selection
- Open your image in Photoshop and locate the Properties Panel;
- Navigate to the Quick Action subpanel, where the magic begins;
- Rather than opting for the conventional Remove Background button, click on the Select Subject button.
By clicking that button, you’re unleashing the might of Adobe Sensei, an intelligent algorithm designed to understand and recognize the subjects within your images. After this step, you’ll witness marching ants or dotted lines elegantly outlining your subject – an indication that your subject has been expertly selected while leaving the background untouched.
Step 2: Freedom to Relocate
- With your subject artfully selected, it’s time to wield your creative control;
- Select the Move Tool (shortcut: V) or locate it in your toolbar;
- Hover your cursor over the subject enveloped by the marching ants, and watch as the power of Photoshop unfolds before you.
Now, you have the liberty to relocate your subject without the hassle of dragging along the pesky background. This opens up a myriad of possibilities, whether it’s repositioning your subject for a better composition or preparing it for a different background altogether.
Exploring the Magnetic Lasso Tool: A Creative Approach to Selections
The Magnetic Lasso Tool, a versatile asset in the world of digital design, shares a kinship with the Pen Tool but offers a unique approach to selecting elements within your images. This tool operates by allowing you to trace your desired subject, beginning at one point and concluding where your path meets its starting point. The real charm lies in the efficiency it brings to your workflow, saving you precious time compared to the traditional Pen Tool. In this comprehensive guide, we’ll delve into the ins and outs of using the Magnetic Lasso Tool, complete with step-by-step instructions and expert tips to enhance your selection skills.
Step 1: Accessing the Magnetic Lasso Tool
To kickstart your creative journey with the Magnetic Lasso Tool, follow these simple steps:
- Keyboard Shortcut: For a quick start, press ‘L’ on your keyboard to select the Magnetic Lasso Tool;
- Toolbar Navigation: Alternatively, navigate to the Toolbar, where you’ll find a distinctive icon featuring a magnet with a polygonal shape. Clicking on this icon will activate the Magnetic Lasso Tool;
- Hidden Gem: If you’re having trouble locating the tool in the Toolbar, right-click on the three dots situated at the bottom of the Toolbar. This action will reveal a dropdown menu containing an array of tools. Scroll through the list until you find the Magnetic Lasso Tool, then click on it. Instantly, your cursor will transform into a lasso equipped with a magnet icon.
Step 2: Effortless Subject Tracing with the Magnetic Lasso Tool
When it comes to removing backgrounds in Photoshop, the tracing process can be a game-changer. While using the Pen Tool may require numerous clicks and drags to meticulously trace the subject’s contours, the Magnetic Lasso Tool introduces a more intuitive and efficient method.
Here’s how to use the Magnetic Lasso Tool effectively:
- Layer Selection: Start by selecting the layer containing the subject you wish to isolate from its background. Ensure you have the Magnetic Lasso Tool already chosen from the toolbox;
- Initial Click: Click anywhere along the subject’s perimeter to initiate the tracing process. This click serves as your starting point;
- Effortless Tracing: Now, here’s where the magic happens. Begin moving your cursor along the subject’s outline as if you’re freehand drawing it. Here are a few tips to make this process smoother:
- Maintain a Steady Hand: A steady hand will yield better results. If you’re using a graphic tablet, it can provide more precise control;
- Zoom In: Zoom in for intricate details. This will allow you to follow the subject’s contours with precision;
- Release the Mouse Button: Unlike the Pen Tool, you don’t need to click continuously. Simply keep the mouse button pressed down while tracing.
- Magnetic Effect: As you trace, you’ll notice the Magnetic Lasso Tool’s unique magnetic effect. This smart feature automatically adjusts the path, adhering closely to the subject’s outline, making your job much easier;
- Completing the Trace: Continue tracing until you’ve encircled the entire subject. When you reach your starting point, click on it to close the path. This action finalizes the subject’s tracing.
Step 3: Precisely Removing the Background
In this crucial step of your image editing journey, we’re going to delve deeper into the intricacies of removing the background with precision and finesse. By following these steps, you’ll not only master the art of eliminating unwanted backgrounds but also gain the ability to retain and manipulate your images like a pro.
- Replace Ants with Precision Selection:
- After successfully outlining the area you wish to keep using the pen tool or other selection methods, the familiar marching ants will take their place along your path. This is your visual cue that your selection is ready for the next stage;
- A window labeled “Make Selection” will gracefully pop up on your screen. Ensure that the “Feather Radius” is set to 0, ensuring a sharp selection, and the “Operation” is set to “Selection.” Once satisfied, confidently click the “OK” button.
- Enter the Select and Mask Realm:
- Now, let’s dive into the advanced terrain of fine-tuning your selection. Navigate to the top menu, and with a simple click on “Select,” a dropdown menu will unfurl before your eyes. Scroll down this menu and find the gem we’re looking for – “Select and Mask.” Click on it to open up a world of possibilities.
- The Properties Panel Revelation:
- As you step into the “Select and Mask” realm, you’ll be greeted by the versatile “Properties Panel.” Here’s where the magic unfolds;
- To access the critical “Output Settings,” scroll all the way down within the panel. It’s often nestled at the bottom, so be patient;
- Click on the tiny arrow located on the left of “Output Settings,” and like a magician revealing their secrets, additional options will emerge before you.
- Choosing Your Output Wisely:
- Under the section titled “Output to,” click on the dropdown menu to unfurl a plethora of options. Your mission here is to select “Layer Mask” – the gateway to ultimate control over your image;
- Once you’ve made your choice, confirm your selection by clicking the trusty “OK” button.
- Revel in the Power of Layer Masks:
- Now, as you return to the “Layers Panel,” you’ll be greeted by a sight that signifies your newfound mastery – a layer mask thumbnail, proudly displaying a monochrome palette of black and white;
- This ingenious layer mask acts as a guardian of your original image. It ensures that no part of your precious picture is irrevocably lost in the background-removal process;
- This newfound ability grants you the power to summon the removed background back into existence or, should you wish, continue refining your image by eliminating more of it.
Conclusion
In conclusion, mastering the art of background removal in Photoshop is a highly valuable skill, offering an array of creative possibilities for graphic design work. Regardless of your desired outcome, whether it be creating transparency, substituting the background, or adjusting its color, Adobe Photoshop provides a versatile toolkit.
Before embarking on this journey, it is crucial to assess your image carefully. Opting for high-resolution images with clean backgrounds is ideal, but even in cases where complexity or image quality poses challenges, Photoshop remains a powerful tool for achieving the desired results.
This tutorial has guided you through various methods of background removal in Photoshop, utilizing Photoshop CC 2022 on a Mac OS as our platform. Armed with this knowledge, you can now embark on your creative endeavors with greater confidence and skill in manipulating and enhancing your images.