Exploring a document in Adobe Illustrator opens up a vast array of pathways, tailored to meet different preferences and requirements. Adobe Illustrator, akin to its counterparts Adobe Photoshop and Adobe InDesign, is equipped with a wide selection of tools and features, all designed to aid in achieving your specific creative vision. This leads to the pertinent inquiry: What is the most effective method to zoom out in Adobe Illustrator?
This thorough guide will equip you with a deep understanding of various zoom controls in Adobe Illustrator CC. You’ll gain the expertise to smoothly zoom in and out, tailoring your approach to fit your personal preferences and drawing from a collection of best practices presented in this guide. Your exploration will guide you to identify the most fitting zooming strategy that resonates with your unique style.
Mastering Artboard Control in Adobe Illustrator
Adobe Illustrator, a powerhouse for creative minds, is often filled with numerous artboards within a single project. However, it can be quite cumbersome to navigate and zoom in on a specific artboard, especially when you have a plethora of them. Fret not, for we’ve got a solution that’ll streamline your workflow and make your Illustrator experience smoother than ever.
Navigating to the Artboards Panel in Adobe Illustrator:
- Initial Steps: Begin your creative journey in Adobe Illustrator by delving into the Artboards panel. To initiate this, head to the “Windows” menu. Here, amidst various options, locate “Artboards.”;
- Activating the Panel: On selecting “Artboards,” a new window emerges. This is where the Artboards panel makes its grand appearance, ready to assist in your creative process.
Exploring the Array of Artboards:
- Overview of Your Workspace: The Artboards panel serves as a window to your creative universe. Regardless of the number of artboards – be it a singular masterpiece or a series of ten – this panel offers a comprehensive glimpse of your entire workspace;
- Organization and Accessibility: Each artboard, with its unique design and purpose, is neatly presented, making it easy to navigate and manage multiple projects simultaneously.
Mastering the Art of Focus in Adobe Illustrator:
- Focus with a Click: In the realm of the Artboards panel, a double-click on any artboard is akin to casting a spell. This simple yet powerful action brings the selected artboard into a crystal-clear focus, ensuring that your attention is undivided;
- Enhanced Concentration: This feature is particularly useful when intricate details demand your undivided attention, allowing for precision without the distraction of other elements in your workspace.
Embracing Solo Artboard Mode:
- Transforming the Workspace: Engaging the solo artboard mode by double-clicking transforms your workspace. The chosen artboard claims the spotlight, relegating all else to the periphery;
- Efficient Workflow: This mode is a boon for efficiency, eliminating the need for constant adjustments like zooming and panning. Your workflow becomes smoother, allowing you to concentrate solely on the artboard at hand.
Zooming In and Out with Precision:
- Zoom at Your Own Pace: With your chosen artboard in the spotlight, you gain complete control over zooming. Whether you need to zoom in to work on intricate details or zoom out for a bird’s-eye view, you can do it with precision and ease;
- Efficiency Boost: By focusing on one artboard at a time, you enhance your efficiency. No more accidental zooming on the wrong canvas or the need to constantly shift your workspace. Your creative flow remains uninterrupted.
Mastering the Art of Zooming in Adobe Illustrator
If you’re an Adobe Illustrator enthusiast, you know that precision is key when it comes to creating stunning artwork. One of the most fundamental skills in your Illustrator toolkit is mastering the Zoom tool. In this comprehensive guide, we’ll walk you through everything you need to know about using the Zoom tool effectively to enhance your creative process.
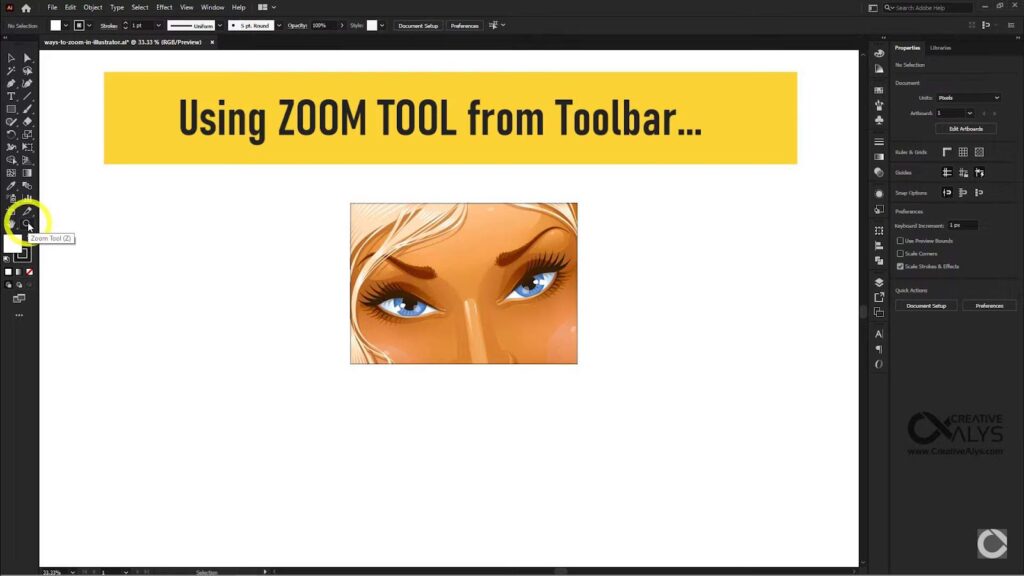
Locating the Zoom Tool
Before you can start zooming in and out with finesse, you need to locate the Zoom tool. It’s like finding a hidden gem in the vast Illustrator landscape. Here’s how you do it:
- Toolbar Exploration: Begin by checking the Toolbar, which is typically located on the left side of your Illustrator window. If, for some reason, you can’t spot the Toolbar, don’t fret – we’ve got a solution for you;
- Accessing the Toolbar: Head to the top menu bar and click on “Window.” A dropdown menu will appear;
- Selecting Toolbars: From the dropdown, navigate to the “Toolbars” option. Click on it, and you’ll be presented with two choices: “Advanced” and “Basic.” Both have their merits, so choose the one that suits your needs.
- Advanced Toolbar: Offers a comprehensive set of tools for power users;
- Basic Toolbar: Provides essential tools for a simplified workspace;
- Zoom Tool Activation: Once you’ve got your chosen Toolbar visible, look for the magnifying glass icon amidst other tool icons. That’s your Zoom tool! Click on it, and watch your cursor transform into a magnifying glass with a plus (+) sign inside.
Zooming In Like a Pro
Now that you’ve armed yourself with the Zoom tool, let’s delve into the art of zooming in:
Mouse or Trackpad Magic: With your newly transformed cursor, navigate to your artboard. A single left-click or a gentle tap on your trackpad will initiate a zoom-in, making your artwork larger and more detailed.
Repeat for Precision: Each time you employ the Zoom tool with the plus sign, you’ll zoom in by one level. This incremental approach allows for precision and control.
Zooming Out with Ease
Zooming out is just as crucial as zooming in. Here’s how to do it effortlessly:
- Cursor Transformation: To prepare for zooming out, press and hold down the Option key (Mac) or Alt key (Windows). Your magnifying glass cursor will change, displaying a minus (–) sign;
- Zooming Out: While still holding the Option key (Mac) or Alt key (Windows), left-click your mouse or tap your trackpad. This action will initiate a zoom-out, gradually reducing the size of your artwork;
- Fine-Tuning: To zoom out further, click the minus sign a few more times until your artwork is comfortably scaled down.
Bouncing Back with Zoom
There might come a time when you want to get back to that detailed view. No worries, it’s easy:
- Release the Key: Let go of the Option key (Mac) or Alt key (Windows), and watch the minus sign in the magnifying glass transform back into a plus sign;
- Zooming Back In: As before, left-click your mouse or tap your trackpad, and voilà – you’re back to zooming in on the finer details of your artwork.
Mastering Zoom Shortcuts for Effortless Navigation
Zooming in and out in design software can sometimes be a bit of a hassle, especially when you’re in the creative zone and don’t want to break your flow by reaching for your mouse or trackpad. Fortunately, there’s a solution: keyboard shortcuts. By harnessing the power of keyboard shortcuts, you can seamlessly zoom in and out without the need to switch tools. Let’s explore these shortcuts in detail to supercharge your design workflow.
Zooming on Mac OS:
When using Mac OS, you have the advantage of using specific keyboard shortcuts to enhance your zooming experience. These shortcuts are a quick and efficient way to navigate through your designs:
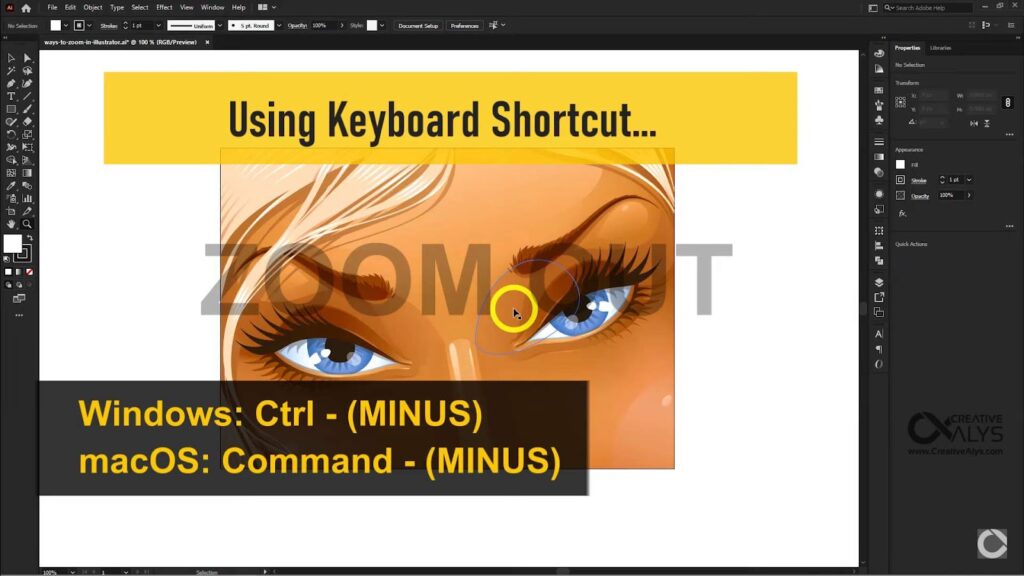
- Zoom Out (Mac OS):
- Keyboard shortcut: Press Command -;
- Result: Zoom out by 16.67% of your current view.
- Zoom In (Mac OS):
- Keyboard shortcut: Press Command +;
- Result: Zoom in by 16.67% of your current view.
- Reset Zoom (Mac OS):
- Keyboard shortcut: Press Command 1;
- Result: Instantly return to a 100% view of your artboard;
- Pro Tip: To fit your entire artboard into the document window or view it at actual size, press Command 0.
Zooming on Windows:
If you’re using Windows, don’t worry; there are keyboard shortcuts tailored just for you. These shortcuts work seamlessly to provide you with the same zooming convenience:
- Zoom Out (Windows):
- Keyboard shortcut: Press Ctrl -;
- Result: Zoom out by 16.67% of your current view.
- Zoom In (Windows):
- Keyboard shortcut: Press Ctrl +;
- Result: Zoom in by 16.67% of your current view.
- Reset Zoom (Windows):
- Keyboard shortcut: Press Ctrl 1;
- Result: Effortlessly return to a 100% view of your artboard;
- Pro Tip: To fit your entire artboard into the document window or view it at actual size, press Ctrl 0.
Navigating and Zooming in Adobe Illustrator: Strategies and Techniques
Zooming in Adobe Illustrator can be a bit of a puzzle, especially when it’s crucial to focus on a specific area of your artwork. Understanding how to effectively navigate and zoom using keyboard shortcuts can significantly enhance your workflow. Here’s an insightful guide on mastering these techniques:
1. Understanding Zoom Functionality:
- Adobe Illustrator’s zooming mechanism operates relative to the visible area in your workspace;
- Using keyboard shortcuts for zooming adjusts the view based on the currently displayed section of your artwork.
2. Effective Navigation to Desired Zoom Location:
- Before zooming, it’s essential to navigate to the exact spot you want to zoom in on or out of;
- To accomplish this, the Hand Tool is your best ally.
3. Utilizing the Hand Tool:
- Activate the Hand Tool by pressing and holding the spacebar or by tapping the ‘H’ key;
- While holding the spacebar, use a left-click (mouse) or a tap (trackpad) and drag to glide over different parts of your design;
- If you chose the ‘H’ key, the cursor transforms into the Hand Tool icon. You can then click and drag to move around.
4. Zooming with Precision:
- Once you’ve navigated to the desired area, employ the zoom shortcuts to enlarge or reduce your view;
- Remember, Illustrator zooms into or out of the area that’s predominantly visible on your screen.
Boost Your Efficiency: Zoom In and Out with Keyboard Shortcuts
In the fast-paced world of design, every second counts. Whether you’re racing against tight deadlines or just aiming for a more efficient workflow, mastering keyboard shortcuts can be a game-changer. One essential shortcut that can save you valuable time is switching to the Zoom Tool with a simple keystroke.
Why Use Keyboard Shortcuts for Zooming?
- Speed is of the essence: When time is of the essence, navigating through menus with a mouse can be cumbersome;
- Streamline your workflow: Simplify the process of zooming in and out to focus on the finer details of your design;
- Precision and control: Keyboard shortcuts offer precise control over your zoom level, helping you achieve pixel-perfect designs.
How to Switch to the Zoom Tool with a Keyboard Shortcut
Imagine you’re engrossed in your project, using the Pen Tool to create intricate lines and shapes. Suddenly, you need to zoom in to add some finer details without missing a beat. Here’s how to seamlessly transition to the Zoom Tool:
- Press the Z Key: The magic begins with a simple keystroke. When you press the Z key on your keyboard, your cursor will transform into a magnifying glass icon. This is your signal that you’re now in zoom mode;
- The Default Zoom Icon: In your new zoom mode, the cursor will display a magnifying glass with a plus sign (+). This means you’re ready to zoom in;
- Zooming In: To zoom in and get up close and personal with your artwork, all you need to do is left-click anywhere on your canvas. No more searching for the zoom tool with your mouse!
Benefits of Using Keyboard Shortcuts for Zooming
By incorporating these keyboard shortcuts into your design routine, you’ll experience a multitude of advantages:
- Speed: Instantly switch between tools and zoom levels, saving you precious seconds;
- Efficiency: Eliminate the need to fumble through menus or search for the zoom tool icon;
- Precision: Achieve pixel-perfect precision in your designs with ease;
- Seamless Workflow: Maintain your creative flow without interruptions;
- Reduced Strain: Minimize strain on your wrist and hand by reducing mouse usage.
Precision Zooming with Percentages
Sometimes, you find yourself needing precise control over your zoom level in applications or software, and that’s when zooming by specific percentages becomes invaluable. Here’s a comprehensive guide on how to master this skill for a seamless experience:
Mastering Manual Percentage Zooming: Precision at Your Fingertips
Manual percentage zooming is a handy tool that gives you the power to control your zoom level with unparalleled precision. Whether you’re a graphic designer, video editor, or simply someone who values exactitude, this method is sure to enhance your workflow. Let’s delve into the details and make the most of this feature:
How to Zoom by Percentage: A Step-by-Step Guide
- Cursor Placement: Position your cursor in the very bottom-left corner of your screen. This is your starting point for the zooming adventure;
- Double-Click Magic: Within the percentage field box, perform a quick double-click. This seemingly simple action activates the zoom-by-percentage feature, setting the stage for your zooming journey;
- Text Input: Voilà! A text input field appears, inviting you to input the precise percentage value you desire. Whether it’s a subtle 10% increase or a dramatic 2000% enlargement, this is where you make it happen;
- Hit ‘Enter’: With your desired percentage safely entered, press ‘Enter.’ Watch in awe as your canvas seamlessly adjusts to the specified zoom level. Precision at its finest!
Explore Preset Percentages: Instant Zoom Gratification
Many applications and software recognize the need for speed and convenience, offering preset percentage options that are just a click away. Let’s explore how to tap into this treasure trove of instant zoom gratification:
- Preset Access: Look for a small arrow pointing downward, usually residing on the right side of the percentage field. This unassuming arrow holds the key to preset percentages;
- Dropdown Delight: Click on the arrow to open a dropdown menu brimming with preset percentages. These presets cater to a variety of needs, from “Fit on screen” for an overview to colossal values like 64000% for intricate details;
- Select and Zoom: Simply select the preset percentage that aligns with your project’s demands by clicking on it. Marvel as your canvas instantly zooms to the desired level. Efficiency at its finest!
Seamless Zooming in Adobe Illustrator: A Creative’s Dream
Adobe Illustrator is a playground for creativity, but the constant tool-switching can disrupt your artistic flow. Fear not, for we have a solution that keeps your creative juices flowing without missing a beat. Dive into the world of seamless zooming with this quick guide:
Using Your Keyboard and Mouse: The Magic of Shortcuts
- Option/Alt Key Power: To begin your journey towards seamless zooming, hold down the Option key (Mac) or Alt key (Windows) on your trusty keyboard;
- Mouse Wheel Marvel: While maintaining the Option or Alt key hold, simply scroll your mouse wheel up and down. Like a conductor directing an orchestra, you’ll effortlessly adjust your zoom level without the need to switch tools;
- Trackpad Elegance: If you’re working on a laptop equipped with a trackpad, fret not! The two-finger trackpad swipe performs just as elegantly. Instead of scrolling, glide two fingers up and down the trackpad for fluid zoom control.
Expanding the View
To achieve a more extensive zoom out from your artwork, effortlessly slide two fingers downwards while concurrently pressing the Option key (Mac) or Alt key (Windows).
Narrowing the Focus
In contrast, for a more detailed zoom in on your artwork, smoothly glide two fingers upwards while maintaining the Option key (Mac) or Alt key (Windows) engaged.
Benefits of This Method
- Seamless Workflow: This method is excellent when you’re using another tool and want to quickly zoom in or out without interrupting your workflow;
- No Tool Switching Needed: The beauty of this technique is that it eliminates the need to switch to the Zoom Tool. You can smoothly adjust your zoom level while using any other tool in Illustrator;
- Effortless Reversion: Should you wish to return to your previous zoom level, it’s as simple as holding the Alt key and swiping up.
Unlocking Illustrator’s Zoom Options for Effortless Navigation
Adobe Illustrator is a powerful tool for unleashing your creativity, but there are moments when your keyboard seems to have a mind of its own, leaving you stranded without zoom control. Fear not, as we’ll explore the Zoom Options nestled within the View Menu to help you effortlessly navigate your artwork and maintain your design flow.
Step 1: Accessing the Zoom Options
- Open your Illustrator project and find yourself in a predicament where keyboard shortcuts won’t do the trick;
- Direct your attention to the top menu bar, where a world of possibilities awaits;
- Click on the ‘View’ option, which will gracefully unveil a drop-down menu filled with essential tools for your design journey.
Step 2: Zooming Out for Perspective
- Now, scroll down the drop-down menu until you discover the ‘Zoom Out’ submenu;
- Click on this invaluable option, and behold as your artwork gracefully shrinks before your eyes, providing you with a broader perspective of your canvas.
Step 3: Zooming In for Precision
- When you need to get up close and personal with your design, navigate back to the ‘View’ menu;
- Click on the ‘Zoom In’ submenu to zero in on the intricate details of your artwork.
Mastering Zoom Functions with Your Laptop’s Trackpad
Are you looking to elevate your Adobe Illustrator skills without the need for extra peripherals or complex shortcuts? You’re in luck! You can seamlessly navigate and manipulate your artwork files using just your laptop’s trackpad. No additional keys or accessories required. In this comprehensive guide, we’ll explore how to efficiently zoom in and out of your canvas, making your design process smoother and more intuitive.
Getting Started
Before we dive into the specifics of zooming, ensure you have Adobe Illustrator open and your artwork file loaded. Once you’re ready to make those pixel-perfect adjustments, follow these simple steps:
- Zooming In:
- Position your cursor where you’d like to zoom in, focusing on the area that requires closer scrutiny;
- Place two fingers on your laptop’s trackpad, ready for action.
- Now, let’s zoom in:
- Spread Your Fingers: To magnify your canvas, gently stretch your two fingers away from each other on the trackpad;
- Focus on Details: Take advantage of this zoom function to meticulously fine-tune intricate elements, such as text, lines, or small objects.
- Zooming Out:
- Find the section of your artwork that you want to view from a broader perspective;
- Prepare your trackpad by positioning two fingers.
- Time to zoom out:
- Pinch Together: To zoom out and see the bigger picture, perform a pinching motion by drawing your two fingers closer together on the trackpad;
- Overview Your Design: Utilize this function to assess the overall composition of your artwork, making sure everything fits harmoniously.
Conclusion
In conclusion, Adobe Illustrator offers a versatile toolkit for navigating and manipulating your creative projects. The diverse zooming options available empower users to tailor their experience to their unique needs, whether it’s gaining a comprehensive view of their artwork or honing in on specific details. By mastering these zoom controls and techniques, you can enhance your efficiency and precision in Adobe Illustrator CC. So, embrace the wealth of possibilities at your fingertips and choose the zooming method that suits your creative journey best.